


-
Industries
Healthcare & Compliance
Patient data systems, compliance reporting, and workflow automation for regulated environments.
- HIPAA-aware integration pipelines
- Automated compliance dashboards
- Patient workflow digitization
Logistics & Supply Chain
Real-time tracking, route optimization, and inventory visibility across your distribution network.
- ERP/WMS integration
- Automated dispatch workflows
- Supply chain dashboards
SaaS & Tech-enabled
Scale your product infrastructure, integrate third-party tools, and ship features faster with reliable ops.
- API-first architecture
- Multi-tenant infrastructure
- CI/CD and release pipelines
Banking & Financial
Secure transaction processing, regulatory reporting, and customer-facing portals for financial services.
- Regulatory reporting automation
- Secure data integration
- Customer portal modernization
- Case Studies
Featured Case Studies
Browse all case studies →Euro Truck ServiceLogistics firm automated 12 manual workflows in a single 30-day sprint
"Read case study →Ergonnex AI 360Ergonnex AI 360 is a powerful project management platform that helps IT companies manage their projects better with built-in AI-powered analytics
Read case study →PanoramikPanoramic caters to your passion for sharing photos in a social media environment.
Read case study →
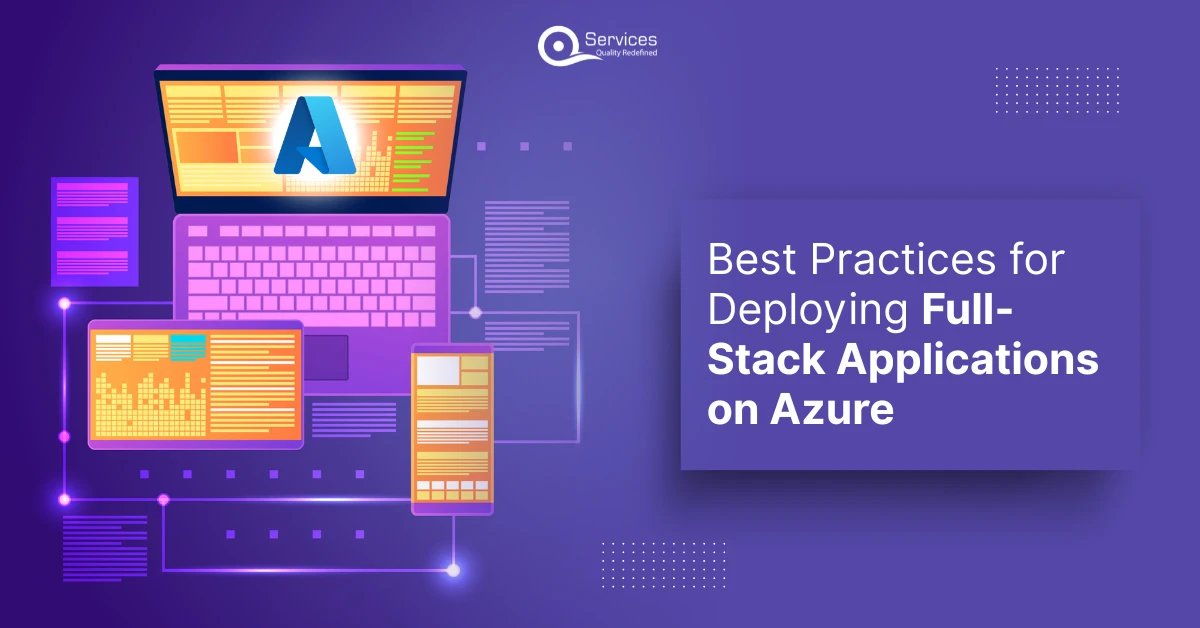
Providing node.js and react full stack applications on Azure can be optimized and efficiently if best practices follow. Some important recommendations for ensuring successful provisions are:

1. Architecture Considerations
- Microservices Architecture: If your microservices are large, consider breaking them down into microservices. This allows for better scalability and maintainability.
- Using Azure Services: Use Azure services such as Azure functions on a serverless computer, Azure Cosmos DB in NOSQL databases, or Azure SQL database in relational data.
2. Environment Configuration
- Environment Variables: Save Azure App confidential information (API keys, database connection code sequences, etc.) as environment variables rather than curing Azure App -Service Settings in your application.
- Configuration Management: Use Azure App Configuration to manage application settings and feature flags.
3. Design Strategy
- Continuous Integration/Continuous Delivery (CI/CD): Set up your CI/CD pipeline using Azure DevOps or GitHub actions to automate the delivery process. This ensures that your applications are always up to date.
- Stage Environment: Create a separate staging environment for testing before providing production. This will help you discover problems early.
4. Containerization
- Docker: Consider Docker containerization for node.js and React applications. This allows for a consistent environment from a development, testing and production perspective.
- Azure Container Instance or Azure Kubernetes Services (AKS): Use these services to provide and manage containers.
5. Performance Optimization
- Static File Hosting: Provide React as a static file using Azure Blob storage or Azure Static web apps to improve performance and reduce costs.
- CDN: Use Azure Content Delivery Network (CDN) to improve static assets up to near-user intermediate lines and load times.
6. Security Best Practices
- HTTPS: Always use HTTPS for secure communication. Azure App Services offers free SSL certificates.
- Authentication and Authorization: Securely manage user authentication using Azure Active Directory or App Service Authentication.
- Network Security: Use Azure Virtual Network (VNT) to isolate resources and control access.
7. Monitoring and Logging
- Experience: Integrate insights into Azure applications to monitor application performance, pursue errors, and analyze user behavior.
- Protocol: Implement logs in Node.js applications using libraries such as Winston and Morgan and send logs to Azure Monitor or Azure Log Analytics.
8. Scaling and Load Compensation
- Auto Scaling: Configures autoscaling of app services based on metrics such as CPU usage and requirements to handle different loads.
- Load Compensation: Use Azure Load Balancer or Azure Application Gateway to distribute traffic to several instances of your application.
9. Database Management
- Connection Pooling: Implement connection pools in node.js applications to efficiently manage database connections.
- Database Security: Protect your databases regularly with Azure’s integrated backup solution.
10. Documentation and Maintenance
• Documentation: Keep clear documentation for the delivery process, architecture, and all specific configurations.
• Regular Updates: Keep your dependencies up to date to maintain JS and benefit from security patches and performance improvements.
11. Test
- Automatic Testing: Implement unit and integration tests for node.js and React applications. Use tools like Mokka/Chai for React jokes and node.js.
- Load Test: Power load testing using tools such as Azure Load tests allow applications to handle expected traffic.
If you follow these best practices, you can ensure that knot.js and React full stack applications are efficient, secure, secure and scalable in Azure. Check your practice regularly while Azure Services is developed, and its applications grow.
How to Host a Full Stack App with Azure App Service

Azure App Service is a fully managed platform for creating, serving and scaling web apps. It supports a variety of programming languages and frameworks and is ideal for providing full stack web applications, including those written with node.js and React. Here are step-by-step instructions for providing a full stack to a web application using Azure App Service.
Step 1: Instruct Azure Account A
1. Create an Azure account:
- Visit the Azure website.
- Click “Start” to create a free account. You may need to provide your credit card information to check.
2. Register with Azure Portal:
- Once you have created an account, register with Azure Portal.
Step 2: Prepare the application before
1. Develop a full stack application:
- Make sure your application is ready. This usually includes frontends (e.g. Reactions) and backends (e.g. node.js).
- Test your application locally to ensure it works as expected.
2. Containerization (optional):
- If you are using Docker, create Docker files on both the front and backend.
- Create Docker photos and test them locally.
Step 3: Create Azure App Services
1. Create a resource group:
In the Azure portal, click Resource Groups in the left sidebar.
• Click Add to create a new resource group. Name him and choose a region.
2. Create front-end app service:
• Click “Create Resource” and search for “App Service.”
• Click Create and enter the required details.
• Subscription: Select your subscription.
• Resource Group: Select the resource group you created.
• Name: Enter the app into a clear name (this is part of the URL).
• Publish: Select “Code” or “Docker Container” based on your setup.
• Runtime: Select the corresponding term for the frontend (e.g. node.js in React app).
• Region: Select the same region as the resource group.
• Click “Create Review” and then click “Create.”
3. Create an app service for the backend:
• Repeat the process to create another app service for the backend.
Step 4: Provide application
1. Provides a frontend:
• Go to Frontend App Service.
• In the left sidebar, click Definition Center.
• Select the provisioning source (Github, Azure Repos, Local Git, etc.).
• Connect the repository according to the input request and select the branch for provisioning.
• If you provide a Static React App, you can create it locally and upload the build folder to the App Service using FTP or Azure CLI.
2. Provides a backend:
• Repeat the provisioning process for the backend app service.
Step 5: Configure Application Settings
1. Setting Peripheral Variables:
• Switch to “Configuration” in the left sidebar for both app services.
• Add all the required environment variables (e.g. database connection sign, API key).
2. CORS configuration:
• If the frontend needs to communicate with the backend, make sure the backend app service enables data traffic from the frontend. You may need to set up CORS (original resource approval) in your backend application.
Step 6: Network setup (if necessary)
1. Network:
• If your application requires secure communication between the front-end and the backend, you must use Azure Virtual Network (VNT) to isolate the resources.
Step 7: Monitor and Manage Applications
1. Warnings
• Set warnings for all issues.
2. Scaling:
• If you need to edit more traffic, you can scale the app service. Go to App Services and click Sculpate or Sculpify in the left sidebar.
Step 8: Check the application
1. HTTPS:
• Make sure your application is operating over HTTPS. Azure App Services offers free SSL certificates.
2. Authentication:
• If your application requires user authentication, you must use Azure Active Directory or App Service Authentication.

Optimizing Azure Full-Stack Application Deployment

Optimizing Azure’s full stack application provisioning strategy involves using Azure functions and services to ensure efficient, reliable and scalable devices. Here, some best practices and strategies should be considered:
1. Pipeline
• Continuous Integration/Continuous Delivery (CI/CD): Implement CI/CD pipelines using Azure Devops, Github Actions, or other CI/CD tools. This automates the creation, testing and delivery process, ensuring that code changes are used quickly and reliably for production.
• Automated Test: Integrating automated tests into CI/CD pipelines, causing early problems. Validate your application using unit testing, integration testing, and end-to-end testing.
2. Container
• Docker: Contains applications in Docker. This ensures consistency in development, testing and production environments.
• Azure Kubernetes Service (AKS): For larger applications, use AKS to manage containers. Provides orchestration, scaling and load compensation.
• Azure Container Instance: Used for a simpler scenario Azure Container Instance to run containers without managing the underlying infrastructure.
3. Microservices Architecture
• Decouple Services: Destroy applications with microservices for increased scalability and maintenance. Each service can be provided independently of each other to allow for more flexible updates and scaling.
• API -Gateway: Use Azure -API management to manage and secure your APIs. It provides features such as rate limiting, caching, and monitoring.
4. Environmental Management
• Several environments: Set up separate environments for development, testing, staging and production. This allows for thorough testing before the changes are reached.
• Infrastructure as Code (IAC): Define and manage infrastructure as code using tools such as arm templates (ARM), teraforms, and biceps. This ensures consistency and repeatability of the specified values.
5. Scaling Strategy
• Auto-Scaling: Configure auto-scaling for Azure App Services or AKS based on metrics such as CPU usage, storage usage, or number of requests. This way, applications can efficiently handle different loads.
• Load Compensation: Use Azure Load Balancer or Azure Application Gateway to distribute traffic to several instances of your application for improved performance and reliability.
6. Performance Optimization
• Static Content Hosting: Use Azure Blob storage or Azure static web app to provide static assets (photos, CSS, JavaScript files, etc.). This reduces application server load and improves performance.
• Content Delivery Network (CDN): Use Azure CDN to store static content close to the user, reduce latency and improve load times.
7. Monitoring and Logging
• Experience: Integrate insights into Azure applications to monitor application performance, pursue errors, and analyse user behaviour. Sets warnings for critical issues.
• Centralized Protocol: Centralize logs from all services using Azure Monitor and Azure Log Analytics. This will help you solve problems and gain insight into your application.
8. Security Best Practices
• Secure Connection: Always use HTTP for secure communication. Azure App Services offers free SSL certificates.
• Authentication and Authorization: Securely manage user authentication using Azure Active Directory or App Service Authentication. Implement role-based access control (RBAC) on resources.
• Network Security: Use Azure Virtual Network (VNT) to isolate resources and control access. Implement Network Security Groups (NSGS) to limit traffic.
9. Database Management
• Connection Pooling: Implement connection personnel in your application to efficiently manage database connections and reduce overhead.
• Database Security: Protect your databases regularly with Azure’s integrated backup solution. Consider using geographical replicas for disaster recovery.
10. Cost Management
• Monitor: Monitor and analyse costs using Azure Cost Management. Set budgets and warnings to avoid unexpected costs.
• Optimize resource usage: Use resources regularly to enlarge unused resources.
Implementing CI/CD with Azure DevOps
Using Azure DevOps for CI/CD pipelines in full-stack utility deployment on Azure includes automating the build, test, and deployment processes. You can installation pipelines to make sure regular and dependable shipping of your packages, integrating computerized checking out and leveraging Azure offerings for scalability and performance.
1. Setting Up Azure DevOps
• Create an Azure DevOps Organization: Sign in to Azure DevOps and create an agency to manipulate your projects.
• Create a Project: Within your agency, create a brand new venture to arrange your repositories and pipelines.
2. Configuring Azure Repos
• Import Repositories: Import your current code repositories into Azure Repos for model control.
3. Creating the CI/CD Pipeline
• Pipeline Overview: Define your pipeline the use of YAML, which incorporates ranges for building, checking out, and deploying your utility.
• Pipeline Configuration: Use a YAML file (e.g., azure-pipelines.yml) to specify the pipeline structure, which include triggers, variables, and ranges.

4. Pipeline Execution Phases
• Test Phase: Use automated tests to ensure code quality and functionality.
•Provisioning Phase: Prepare the application in the desired environment. B. Azure App Service or Azure Kubernetes service.
5. Integration of Automated Tests
• Uniform and Integration Tests: Insert automated tests into the pipeline to validate code changes before providing.
• End-to-end Testing: Run comprehensive tests in a variety of environments using tools such as selenium and browse stacks.
6. DeadingStrategies
• Turtle Green Provisioning: Provides updates in the staging environment before switching traffic to minimize downtime.
• Canary Release: Gradually move changes to a small subset of users to monitor performance and grasp issues early.
7. Monitoring and Logging
• Experience: Integrate insights into your Azure applications to monitor application and error persecution.
• Intensive Protocol: Use Azure Monitor to collect and analyze logs from applications for better error correction.
8. Security Best Practices
• Secure Connections: Make sure all communications are protected using HTTPS.
• Role-Based Access Control (RBAC): Implement RBAC to effectively manage access to permissions and resources.
9. Cost Management
• Monitor resource consumption: Track expenses and optimize resource allocation using Azure cost management tools.
• Budget Notification: Sets notifications that notify you when the output approaches a predefined budget.
Azure DevOps in your CI/CD pipeline allows you to automate the delivery of full-stack applications and ensure optimization processes that improve efficiency, reliability and scalability. Check your pipeline configuration regularly to adapt to your project requirements and Azure functions under development.
Using Azure Static Web Apps for Full-Stack Hosting
Azure Static Web Apps are services hosted with static front-end applications and serverless APIs. It is especially suitable for full stack applications written with frameworks such as React, Angular, Vue.js, and other, combined with serverless backend APIs using Azure functions. Here you can find step-by-step instructions for configuring an Azure Static web app to host a full stack application.
Step 1: Create an application
1. Develop a full stack application:
• Make sure your front-end application (e.g. React) is happy to provide. Create your application locally to ensure it works as expected.
• If you have a backend API (such as using Azure functions), make sure it is developed and tested.
2. Creating a frontend:
• For React, run build commands to create a productionable version of your app. .
Step 2: Create Azure Static Web -App
1. Register with Azure Portal:
• Go to Azure Portal and register with your Azure account.
2. Create a static web app:
• In the left sidebar, click Create Resource.
• Search for and select “Static Web Apps.”
• Click Create.
3. Configure a static web app:
• Subscription: Select Azure subscription.
• Resource Group: Select an existing resource group or create a new resource group.
• Name: Enter a unique name for the static web app.
• Region: Select the region closest to the user.
• Source Control: Select the source representative provider (such as Github, Azure Devops) where your code is hosted.
•App location: Enter the location of the frontend application (e.g., if you are /root).
• API Location: Enter the location of the backend API (for example, /API if you use Azure functions).
• Start position: Enter the initial folder for the frontend build (e.g. build for reaction).
4. Check and Create:
• Confirm the settings and click Create. Azure sets up static web apps and configures the resources you need.
Step 3: Configuring the backend API
1. Azure Function Settings:
• If you use Azure functions for your backend, make sure your feature app is set up correctly.
• You can create Azure functions directly in the Azure portal or provide them locally using the Azure functions core tools.
2. Set up the API:
• If the API is part of the same repository, make sure it is properly structured (for example, the /API folder).
• Azure Static Web App automatically provides Azure functions when you pass changes to the repository.
Step 4: Configuring Routing and Authentication
(if required) This file can define root, authentication, and other settings.
• Example structure:

2. Authentication:
• Azure Static Web App supports authentication with providers such as GitHub, Twitter, and Azure Active Directory. You can configure authentication in the Azure portal in the Authentication section of the Static Web App.
Step 5: Provide the application.
• Azure automatically triggers the build and delivery process.
2. Monitoring Clause:
• You can monitor the provisioning status of the Azure portal in the Provisioning section of the Static Web App.
Step 6: Use the application to
1. Access URL:
• As soon as provisioning is complete, you will receive the URL of your static web app. This URL allows you to access the application.
2. Test your application:
• Make sure both the front-end and back-end work as expected. Test API calls from the front-end to the backend.
Following these steps, you can successfully configure your Azure Static web app to host full stacking. The service provides a seamless way to provide static front-end applications and serverless APIs so that you can focus on development, Azure handles infrastructure.

Security Best Practices for Azure Deployments

Securing full-stack applications on Azure requires a comprehensive approach that covers authentication, data protection, network security, and more. Here we find important strategies and practices to improve the security of full-stack applications deployed to Azure:
1. Use Azure Active Directory (AAD) for authentication
• Single Sign-On (SSO): Use Azure Active Directory for users to authenticate. This way users can register an organizational account and provide SSO functionality.
• OAWH2 and OpenID Connect: Implements OAWH2 and OpenID Connect for SAFE authentication-based authentication. This is especially important for APIs.
2. Verify APIs
• API Management: Use Azure API Management to secure, publish and analyze your APIs. It provides features such as rate limiting, IP filtering, and authentication.
• CORS Configuration: Configure the release of the original cross resource (CORS) to restrict which domains can access the API. This helps prevent unauthorized access.
3. ROLL-Based Access Control (RBAC)
• Fine Grow-In Access Control: Use Azure RBAC to manage user and application permissions. Assign roles based on the most privilege principle and ensure that users only have the necessary privileges.
• Resource Group Safety: Use RBAC at the resource group level to control access to all resources within this group.
4. Encryption and HTTPS • SSL/TLS Certificates:
• SSL/TLS certificates using HTTPS everywhere: Always encrypt data in transit using HTTPS. Azure App Service offers free SSL certificates that are easy to configure.
• Reconsider HTTP to HTTPS again: Make sure all HTTP traffic is redirected to HTTPS and prevents central attacks.
5. Network Security
• Azure Virtual Network (VNE): Use Azure VNEs to isolate resources and control the flow of traffic. This is especially important for databases and sensitive services.
• Network Security Group (NSGS): Implements NSGs to control incoming and outgoing traffic for Azure resources. Defines rules that allow or deny data traffic based on IP addresses and ports.
6. Data Protection
• Impact Peace: Encrypt data in peace using Azure Storage Services Encryption (SSE). Azure SQL databases also offer integrated encryption options.
• In transit encryption: Make sure all data is encrypted between the application and the database using TLS.
7. Secure Application Configuration
• Environment Variables: Store sensitive information (e.g.
• Azure Key Vault: Azure Key – Use to store and manage sensitive information such as secrets, keys, certificates, and more.
8. Security Monitoring
• Security Center: Use Azure Security Center to monitor resources related to weaknesses and compliance.
• Experience: Integrate Azure application research findings to monitor application performance and recognize anomalies or security issues.
9. Implementing Logging and Monitoring
• Intensive logging: Collect and analyse logs from applications and services using Azure Monitor and Azure Protocol analytics. This will help identify suspicious activity.
• Warning: Sets warnings for important events. B. Failed registration attempt or unusual API access patterns.
10. Regular Updates and Patch Management
• Continue updating dependencies: Update application dependencies to patches – known weaknesses. Use tools such as NPM auditing for node.js applications.
• Azure Updates: Provide information about Azure updates and security patches for the services you use.
11. Security and Disaster Recovery
• Regular Fuse: Implement normal backups of database and application data. Use Azure backup for your automated backup solution.
• Disaster Recovery Plan: Develop a disaster recovery plan to ensure business continuity due to security violations or data loss.
12. Team Use
• Safety Training: Create security training for development and business teams. Beware of best practices and the latest security threats.
• Code Review: Implement a code review process to catch security gaps at the start of the development cycle.
Following these security insurance best practices can greatly improve the security centre for full stack applications offered to Azure. Security is an ongoing process. Therefore, check your security measures regularly to adapt to new threats and weaknesses. Stay up to date through the latest security trends and Azure functions that help you protect your applications and data.
Managing Environment Variables in Azure
Management of Azure Surrounding Variables Management to provide a full stack to your application is important for secure and efficient retrieving configuration settings, secrets and other sensitive information. Here you will find comprehensive guidance for managing Azure environment variables, especially for applications provided with Azure App Service, Azure Functions, and Azure Kubernetes Service (AKS).
1. Using Azure App Service
Azure App Service allows you to manage environment variables directly through the Azure Portal.
Step for determining environment variables:
1. Go to App Services and select an application.
2. Configuration Settings:
– Click “Configuration” in the left sidebar.
– You can add new environment variables to the Application Settings tab.
3. Add new settings:
-Click “New Application Settings”.
– Enter the name of the variable (for example, “database_url`) and its value (for example, “Your Database-Connection-String”).
4. Example:
“` javascript
const dburl = process.env.database_url;
“`
2. Steps for determining environment variables:
1. Go to functional app:
– Register in the Azure portal and go to “function app”.
-Select Function App.
2. Configuration Settings:
– Click “Configuration” in the left sidebar.
– You can add new environment variables to the Application Settings tab.
3. Add new settings:
-Click “New Application Settings”.
– Enter the name and value of the environment variable.
-Click “OK” and then “Save”.
4. Accessing peripheral variables for features:
– Environment variables can be used in the Azure function in a similar way.
3. Azure Key Vault:
1. Find the access guidelines you need so that your application can read the secrets.
2. Click Generate/Import to add a new secret (e.g. `db_connection_string’).
3. For example, node.js application:
“` javascript
const {secretclient} = demacss(“@azure/keyvaultscrets”);
const {defaultAcredential} = require(“@azure/dient”);
const connitial = new defaultTazure recurential();
const client = new SecretClient(“https://.vault.azure.net/”, login info);
async function getecret(){
const secret = act client.getSecret(“db_connection_string”) ;
Console.log(Secret.Value);
}
“
4. Steps to use configmaps and Secrets:
1. ConfigMap:
“ Bash
Kubectl -f -configmap.yaml
2. Data:
db_password:
“
-Secret:
“ bash
kubectl use – f secret.yaml
“
3. Access to configMaps and secrets in a pod:
-See your pod or provisioning configuration and secrets yaml:
“ yaml
Apiversion: Apps/V1
Art: Provision
Metadata:
Name: My-App
Specification: Replicate: 1
Conclusion
Deploying full-stack applications on Azure becomes much easier when you follow these best practices. By using the right architecture, proper security measures, and efficient deployment pipelines, you can create reliable and scalable applications.
Remember to use services like Azure App Service for hosting, Azure DevOps for automation, and Azure Active Directory for security. With these practices in place, your Node.js and React applications will perform well and remain secure, letting you focus on developing great features rather than worrying about infrastructure problems. Azure’s comprehensive toolkit gives you everything needed for successful full-stack deployments.


Custom Power Apps Development: Use Cases, Costs, and What to Expect Rohit Dabra | May 7, 2026 Table of Contents Facebook-f Twitter Linkedin Custom Power Apps development is how Microsoft-stack organizations finally close the gap between what IT can build and what the business actually

Power Automate vs Logic Apps is one of the most common architectural decisions Microsoft shops face in 2026, and the stakes are higher than they look. Both tools automate workflows inside the Microsoft stack, both connect to hundreds of services, and both claim to solve
Blazor vs React for Enterprise Apps: When Each One Wins Rohit Dabra | April 28, 2026 Table of Contents Facebook-f Twitter Linkedin Blazor vs React is one of the most debated front-end decisions in .NET projects today. Enterprise builds and modernization efforts often bring this


Sahil Kataria
Founder and CEO

Amit Kumar
Chief Sales Officer


QServices Inc. undertakes every project with a high degree of professionalism. Their communication style is unmatched and they are always available to resolve issues or just discuss the project.
